How to Connect Your Webflow Website with RightBlogger
Set the right API permissions, pick your collection, and publish in one click.
Are you a Webflow user looking to create content faster? You’re in luck! RightBlogger integrates directly with Webflow, letting you send your AI-generated articles straight to your site with just a click.
No more copying and pasting! Imagine creating awesome blog posts in RightBlogger and then instantly sending them over to Webflow.
Sounds good, right?

This post shows you how to set up the Webflow integration in RightBlogger.
RightBlogger + Webflow
What does this integration actually do? It’s simple. You can now send articles you create in RightBlogger directly to your Webflow site.
You’ll see a “Send To” button in RightBlogger. Just click it, and your article will be sent to Webflow.
This works whether you use the AI to create something brand new, or edit content in the RightBlogger Editor.
Setting Up the Webflow Integration: Step-by-Step
Let’s walk through the setup process. It uses “Projects” in RightBlogger.
Projects help you manage your integrations.
Step 1: Go to Projects
First, go to the “Projects” section in RightBlogger.
If you don’t have a project yet, click “Add Project”. Give it a name and add your website URL. You might also want to turn on “Learn from website”. This will help the AI write content that matches your site’s style.
Step 2: Find the Integrations Tab
Now, look for the “Integrations” tab at the top of the page. Click it.
Step 3: Select Webflow
You’ll see options for WordPress, Ghost, and Webflow. Click on “Webflow”.
Step 4: Get Your Webflow API Token
To connect RightBlogger to Webflow, you need an API token. Here’s how to get it:
- Go to your Webflow site. If you’re on a specific page, click the dropdown in the top left corner and select “Site Settings”.
- Click “Apps & Integrations” on the left side.
- Scroll down to “API Access” and click “Generate API Token”.
- Give your token a name, like “RightBlogger Integration”.
- IMPORTANT: Set the permissions:
- For CMS, choose “Read & Write”. This lets RightBlogger add content to your site.
- For Sites, choose “Read Only”. This lets Webflow see your sites.
- Click “Generate Token”.
- Copy the token! This is the only time you’ll see it. If you lose it, you’ll need to create a new one.
- Click “Hide Token Forever” after you’ve copied it.
Step 5: Configure the Integration in RightBlogger
Now, go back to RightBlogger and your project page.
- Paste the API token into the “API Token” field.
- Select your Webflow site from the dropdown menu.
- Choose a Collection. Collections in Webflow are like post types. Select the one you want to use for your blog posts (e.g., “Blog Posts”).
- Select the Content Field. This is where the actual article content will go. Look for a field like “Blog Post Rich Text”. If you’re not sure which one to pick, ask a Webflow expert.
- Choose “Publish Instantly”. If you turn this on, your articles will be published automatically. It’s usually best to leave it off so you can review them first.
- Click “Save Changes”.
Sending Content to Webflow
Now that you’ve set up the integration, let’s use it!
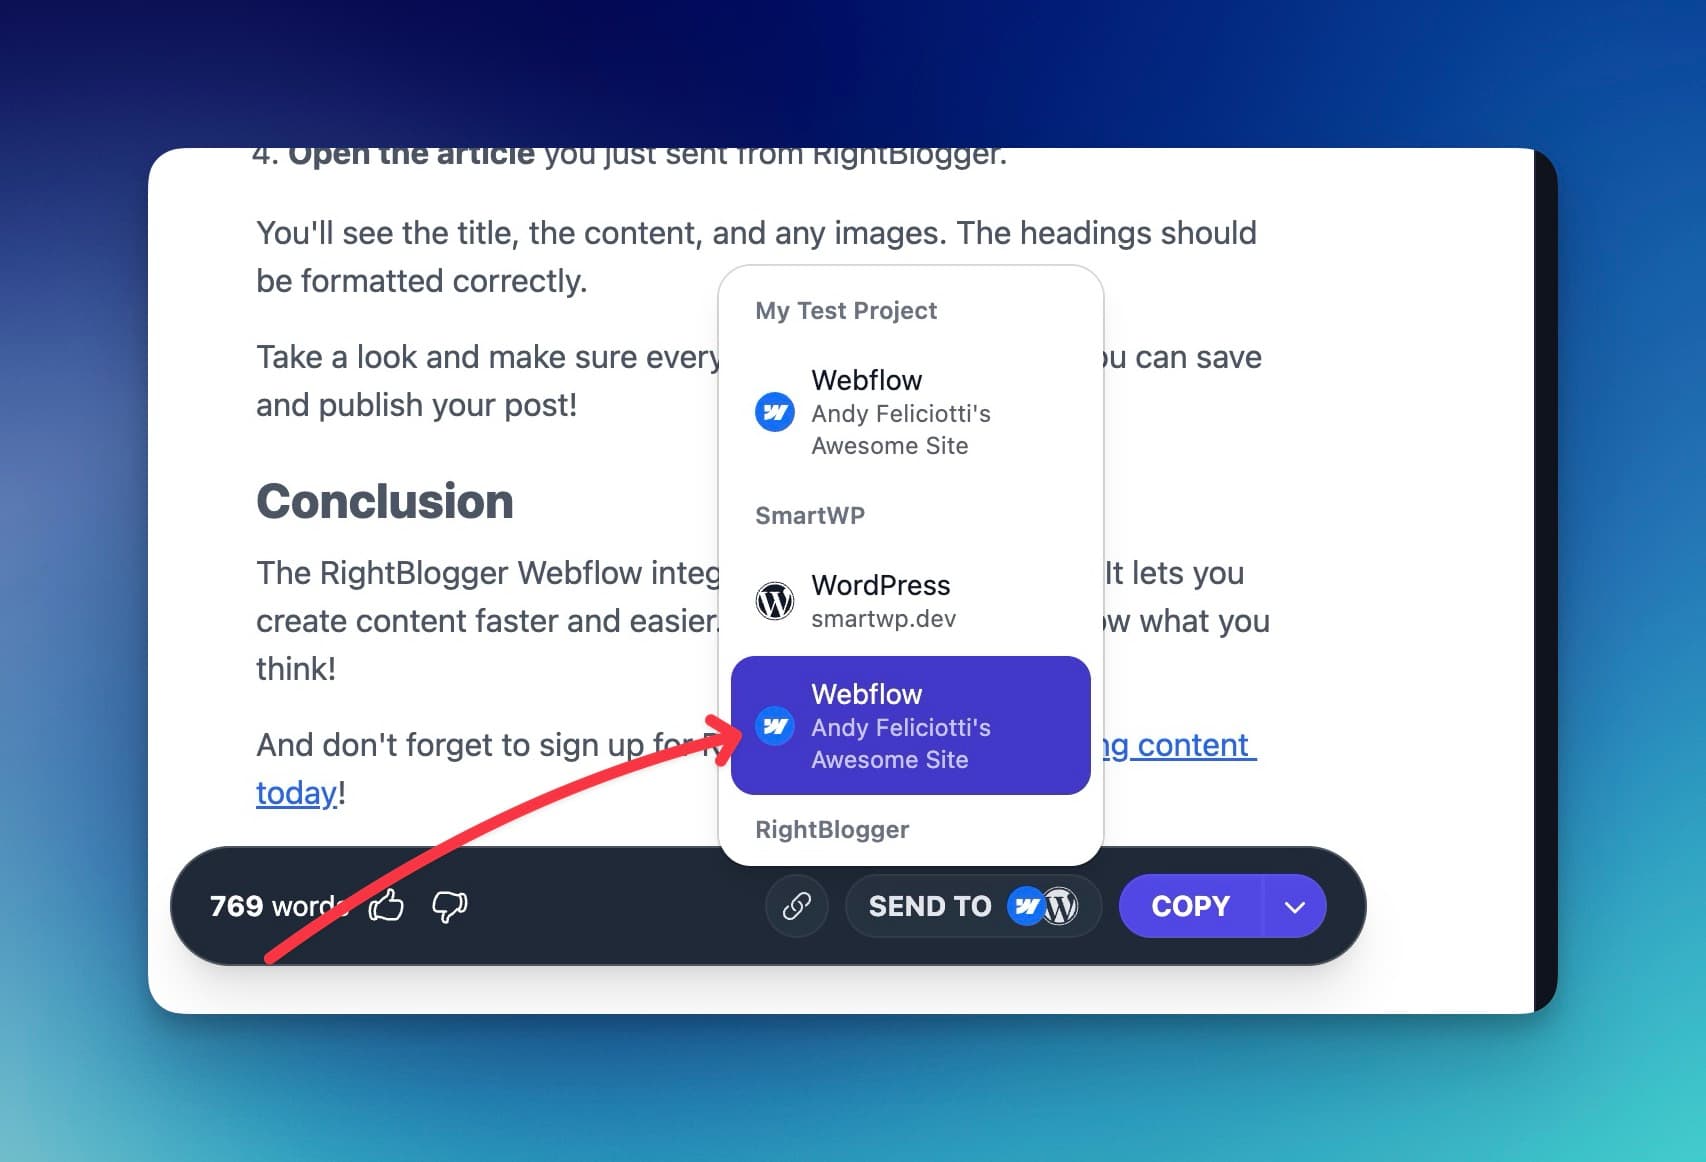
You can use the Article Writer or the Video to Blog tool. Create some content, then scroll down to the “Send To” button. You’ll see the Webflow logo. Click it, and your article will be sent to your Webflow site!
Having trouble? Just contact us.
Viewing Your Content in Webflow
Let’s see how the content looks in Webflow.
- Go to your Webflow dashboard.
- Click on the “CMS” tab.
- Find the Collection you selected earlier (e.g., “Blog Posts”).
- Open the article you just sent from RightBlogger.
You’ll see the title, the content, and any images. The headings should be formatted correctly.
Take a look and make sure everything looks good. Then, you can save and publish your post!
Keeping Posts Optimized with Site Agent
Sending content to Webflow is only half the job. Once your Webflow site is connected, you can also use Site Agent to keep your published posts in shape over time. It runs on a recurring schedule, reviews your content and Google Search Console data, and surfaces high-impact improvements you would otherwise have to hunt for yourself.
Those improvements include internal links between related posts, sharper meta descriptions on pages that rank well but lose the click, and freshness fixes like outdated years in your titles. You decide how much it does on its own, from reviewing every suggestion to applying low-risk fixes automatically, and every change can be undone with one click for 30 days. Site Agent is available on the Solo, Pro, and Agency plans.
Conclusion
The RightBlogger Webflow integration is a real time-saver. It lets you create content faster and easier. Give it a try and let us know what you think!
New:Site Agent
Automated SEO Blog Posts That Work
Try RightBlogger for free, we know you'll love it.
- Automated Content
- Blog Posts in One Click
- Unlimited Usage


